I'm going to start adding one freebie a month. It may be something useful or fun for your homeschool or family. For the month of May the free homeschool item is three bible bookmarks from Bible Bookmarks. These are just a sampling of what the company offers. These bookmarks discuss a certain aspect of the bible and include verses for each day of the week, including questions. The order form mentions billing and shipping costs, but just fill it out and check the bottom box that says it's a free sample at no charge. Enjoy and happy homeschooling!
http://www.biblebookmarks.com/Free-Samples_p_19.html

Monday, May 30, 2011


Monday, May 16, 2011
May Is Planting Month
Sorry for the neglect of the blog. April was a trying month for us, and I just didn't feel like blogging. But all is not lost. We did a lot of planting experiments in April, and I made sure to take pictures of the processes so I could share them with you. To finish up our kindergarten science, I focused on different types of experimental plantings. While they may not be the first time something's been planted, they were the first time we had ever planted anything that way, so it was a learning experiment for us. This week I'll post about our potato plant, our garlic, and our scallions. I'll also share our hay bale garden with you. Avlyn has had a great time doing all of these planting activities. She especially enjoys watching the scallions grow a little bit more each day. If you've never planted something with your child, now is the time to start. It's a great learning experience, and it's fun! Happy homeschooling!
Wednesday, March 23, 2011
How to Make a Leprechaun Trap

We started by cleaning out a bread crumbs container. Then she decorated a piece of green construction paper. I used hot glue to wrap and attach the piece of construction paper to the container. You could use regular glue, but it will take longer to dry.
 Then she stuffed some gold tissue paper down inside to "trick" the leprechaun into thinking that the container was filled with gold, because we all know what leprechauns love - GOLD! After attaching the paper to the container, she added green and gold stick on gems and yellow flowers picked from our forsythia bush.
While she was busy doing that, I created a ladder for the leprechaun to use to climb up into our container for the fake gold. I just cut small tree branches to size and hot glued the pieces together. Then I added some yellow forsythia flowers. We then created a sign to attract the leprechaun by advertising our leprechaun gold.


It took her a while to find just the right spot in our home for the leprechaun trap. After she did, we added some baby gummi bears because we heard leprechauns have a sweet tooth. When we woke up the next morning, our trap was sans leprechaun but the gummi bears were gone and he had dropped some Skittles behind-----because you know they like to taste the rainbow ;)
I hope you like this craft and have fun making one of your own next St. Patrick's Day. Happy homeschooling.

Friday, March 4, 2011
Kindergarten Dinosaur Activities
There are a ton of dinosaur activities available for homeschooling but too much can be a little bit of overkill on the theme, so we just stuck with doing a couple of dinosaur activities. We started by reading lots and lots of books. Most libraries will have a large selection of dinosaur books, and that's where we found all sorts of stories. Some were fun stories like "Dinosaur Vs. Bedtime," while others were more educational books that described the dinosaurs, what they ate, and how they lived. Just visit your local library and see what they have available.
While reading, we talked about how some dinosaurs were plant eaters and some were meat eaters. We learned how to tell the difference between the two and played a little game called, "What Would They Eat?" where we went through the books and guessed what they may have eaten and why we thought that.
Then we talked about fossils and how paleontologists look for fossils and bones to help recreate dinosaurs and the environment that existed when they were alive. To reinforce this idea, I purchased a dinosaur egg from the dollar store. This is a rock like egg that comes with a brush and stick for breaking the rock away and finding the dinosaur bones that are buried inside. You then have to put your dinosaur together using the joints of the pieces. Unfortunately, our plastic eating dinosaur puppy (ironically named Bones,) ate our little dinosaur before we could take a picture of him all put together.

After being paleontologists for the day, we decided to create a brontosaurus from paper plates, an idea I got from the book Paper Plate Crafts.
Basically you fold a couple of paper plates in half, making sure the bottom is flat and rectangular. Next, staple the top together leaving the sides open for the head and tail. Then, using another paper plate, cut a long arch shape for the head and a long pointier shape for the tail. Staple these pieces to the inside of the plate on each end. Now color or paint it, and you have a brontosaurus. The original directions called for legs, but we could never get ours to really stand up on them, so we just left the bottom flat. And this is what we did when we spent 3 days on dinosaurs.


While reading, we talked about how some dinosaurs were plant eaters and some were meat eaters. We learned how to tell the difference between the two and played a little game called, "What Would They Eat?" where we went through the books and guessed what they may have eaten and why we thought that.
Then we talked about fossils and how paleontologists look for fossils and bones to help recreate dinosaurs and the environment that existed when they were alive. To reinforce this idea, I purchased a dinosaur egg from the dollar store. This is a rock like egg that comes with a brush and stick for breaking the rock away and finding the dinosaur bones that are buried inside. You then have to put your dinosaur together using the joints of the pieces. Unfortunately, our plastic eating dinosaur puppy (ironically named Bones,) ate our little dinosaur before we could take a picture of him all put together.


After being paleontologists for the day, we decided to create a brontosaurus from paper plates, an idea I got from the book Paper Plate Crafts.
Basically you fold a couple of paper plates in half, making sure the bottom is flat and rectangular. Next, staple the top together leaving the sides open for the head and tail. Then, using another paper plate, cut a long arch shape for the head and a long pointier shape for the tail. Staple these pieces to the inside of the plate on each end. Now color or paint it, and you have a brontosaurus. The original directions called for legs, but we could never get ours to really stand up on them, so we just left the bottom flat. And this is what we did when we spent 3 days on dinosaurs.


Tuesday, February 8, 2011
Flat Stanley Project for Kindergartners
Last month Avlyn and I embarked on a geography project using an idea from the book Flat Stanley. If you're not familiar with the book, it's a story of boy named Stanley who ends up getting flattened by a bulletin board while he's sleeping. He's able to do all sorts of fun things like become a kite and fly and go down into a sewer to help his mom locate her lost ring. One thing he's also able to do is be put into an envelope and mailed to a friend. This is the basis for the Flat Stanley Project. There are ideas floating all over the Internet about how different people and schools do this project. The official website is The Official Flat Stanley Project. This site has teaching ideas and templates for the Flat Stanley character.
Here's what we're doing (after reading the book):
1. We invited another homeschooling family to join us, and the kids got together one day to create their Flat Stanley's. In our project we are calling them by the kids' names, so it's a Flat Avlyn and a Flat Alexander.
2. While the official website has templates, I downloaded and printed out a blank template from First Palette. This template is plain, no clothes or features, so the kids could get really creative. Here's an example of my Flat Rhyah that I made to give the kids an idea of what they were supposed to do.

3. We got out a copy of a U.S. map and showed the kids where we lived and then showed them how far they would travel to their first destination. We sent Avlyn to Florida, and I believe Alexander was headed to California. We then decided on the number of people we wanted it sent to. We decided that 7 was a good number, and would probably get us the flat kids back within a couple of months.
4. I created a packet of information to be shipped along with Flat Avlyn to each destination. It included an intro letter, an information sheet, and a sign-out sheet. The intro letter basically describes the project and what each person is supposed to do. I asked that they keep her no more than 4 days and then mail her on to a person of their choice. I included an email address for people to email us pictures of things they do with Flat Avlyn while she's visiting.
The information sheets are numbered 1-7 and have a few questions people can answer if they want. I asked them to put where Flat Avlyn is, state and city, what's special about where she's visiting, and what she did while she was there. The end of the packet has a sign in sheet for each person to sign their name. The information sheets are numbered so we'll know which person goes with which information sheet.
5. We mailed them off.
6. Sit and wait. Now it's just up to other people to help us out. One of her grandmothers was the first destination, and she's been giving me updates. So far Flat Avlyn has been to the beach, the library, the grocery store, and yesterday she visited a fire station and took a picture with all of the firemen.
As you can see, this project can be extremely fun if the chosen participants are eager to help you out. Between the two kids, they should go 14 places. If you're working with a large group or have a large family you could choose just one recipient for each person, but since we're small we needed to increase the number of recipients. We're excited to see where our flat children will go and what they'll do. This project will also integrate a lesson about the mail system and how mail is delivered around the world. I'll post an update whenever we get them both back. Happy homeschooling!
Tuesday, January 25, 2011
One Mitten by Kristine George - Book, Activities, and Ideas.
This week we are working with the book One Mitten by Kristine George. This is a really cute story for preschoolers and kindergartners. The main character has one mitten when the story starts, and she does all kinds of different things with one mitten. Then she finds the other and does things with two mittens. I will be posting our activities daily, but wanted to give you a jumping off point for this book if you'd also like to integrate it into your curriculum. Below are two links that will be helpful when planning lessons and activities for this book.
The teaching site for One Mitten- this is provided by the author and she links to a ton of other sites that have mitten activities and ideas.
Jan Brett's Site- this page is actually designed to be used with The Mitten, but it works well for One Mitten, too. I printed out a bunch of the mitten templates for color word practice.
Okay. I've given you the starting point for finding ideas for use with this book. Now it's up to you to be creative and have fun with this book. We started by reading the story and did our first activity today. Look to the blog this week for our activities and ideas that go along with the book/winter theme. Happy homeschooling!
Monday, January 17, 2011
The Greater Than Less Than Gator

To start I wrote two numbers on the white board along with a matching number of X's. I then drew the sign showing greater than or less than and added eyes and teeth. I told her that the gator always eats the bigger number because gators are hungry and they like to eat A LOT. Then we discussed which direction was greater than and which was less than.
Teaching equal to isn't as hard because kids can see that the numbers are the same. I simply told her that when it's equal to the gator is sleeping, so it kind of looks like his mouth is closed. She seemed to understand this explanation easily.

Wednesday, January 12, 2011
Animals that Hibernate - Ladybugs, Turtles and Bears Oh, My!

This month we are learning about hibernation and other winter topics like the Arctic. We've been working on animals that hibernate and learned that most bears aren't true hibernators. They just go into a dormant stage and are very hard to rouse. Other animals and bugs, like the ladybug and the Peeper frog, are true hibernators who don't wake during the winter.
When searching for hibernation activities I found a ton of stuff about bears. But being the atypical family that we are, I wanted to explore a different animal. We chose to focus on the ladybug. First, I printed out a general info sheet from Enchanted Learning about animals that hibernate We talked about the different animals and discussed hibernation. Next, I looked up songs about hibernation but could only find things focused on bears or groundhogs. So, I came up with my own little song about a ladybug. Then we did a ladybug craft and acted out the song. Below is the song and some pictures. This lesson will be followed by a lesson on groundhogs, which will lead into Groundhog Day. Happy homeschooling!
The Little Ladybug Hibernation Song (we sung to an altered tune of The Farmer in the Dell - but you could use any typical rhythm that appeals to you.)
The little ladybug, the little ladybug,
It eats, eats, eats, eats, eats, up aphids before it gets all snug.
It makes a bed in leaves--- or under a rock
It won’t wake up again until it gets a little hot!
Ladybug craft:
1 black sheet of construction paper
1 red sheet of construction paper
Googly eyes or white dots
glue
scissors


Cut a large heart out of the red paper. Cut a medium-sized heart out of the black paper. Cut four to six small hearts out of the rest of the black construction paper. Have your child glue the black piece to the red piece to form the ladybug's body. Add the heart spots on its back. Add the eyes and draw a face, if you wish.
Ladybug Action for Song:
Take a small piece of green paper and put a bunch of white little paper pieces on it to represent a leaf with aphids. Crumple up a couple pieces of gray or white papers to make a rock. Cut out a yellow sun or just a circle to represent the emerging heat of spring. Sing the song as your child takes the ladybug and eats the aphids, goes to sleep under the rock, and slowly walk toward the sun as it emerges from hibernation. We practiced the song 3-4 times and then acted it out a few times.
Take a small piece of green paper and put a bunch of white little paper pieces on it to represent a leaf with aphids. Crumple up a couple pieces of gray or white papers to make a rock. Cut out a yellow sun or just a circle to represent the emerging heat of spring. Sing the song as your child takes the ladybug and eats the aphids, goes to sleep under the rock, and slowly walk toward the sun as it emerges from hibernation. We practiced the song 3-4 times and then acted it out a few times.
 |
| Eating the aphids |
 |
| Hibernating under the rock |
 |
| Coming out of hibernation |
Friday, December 31, 2010
Happy New Year
Just a quick post to say Happy New Year! Hope everyone had a great holiday. The blog will resume in 2011!
Tuesday, December 7, 2010
Sight Word Activities for Kindergarten
If you're like me, you are always looking for fun additions to add to normal curriculum instruction. Reading is one area that often gets overlooked when it comes to being creative. So much stress is put on children to read well, that many workbooks designed for younger children are very repetitious and, let's face it, downright boring. But children do need repetition when learning to read; it's the boredom they could do without.
We are currently working on learning our sight words. We are up to a total of 30 words that she can read fluently and without help. My goal is to have 100 words down fluently by the end of the year. I am doing things completely different than with my son. With him I focused mainly on phonics, but failed to give him a solid grasp of a large amount of sight words. This meant that in first grade he could sound out encyclopedia but struggled with generic sight words like blue and come. So with her I'm focusing largely on sight words and we do phonics 2x a week. By first grade she should be reading fluently and we can get more involved with phonics.
Here are some sight word games or activities we do to break up the monotony of sight word drills and general reading.
Spruce Up the Sight Word - I just found this site yesterday, and I love it. They provide a variety of sight words along with strips of decorative items like eyes, legs, mouths, etc... Your child can read the word and then use the provided illustrations to "spruce up" the sight word. Here's an example of Avlyn's sight word "ME."

Games to Make from Kelly's Kindergarten - This site is fabulous. I stumbled across it on my search for fun sight word activities, and I still haven't explored it thoroughly. She has a ton of games to print out and play. One example is the Krusty Krab game. It's meant to be used to teach money, but what we do is put our sight word flash cards word side down. One of us draws a card and reads the word. If we read it correctly, we move a quarter to the next space and the next person reads a word. Play continues that way. If someone misses a word, they have to move back one space. The person who gets the quarter to the other side first, wins a skittle or M&M or whatever little candy happens to be waiting on the other side.

Note: If using this sight, you will need a lot of paper and printer ink, but I think it's well worth it. We use a lot of these games on family game night, which gets the whole family involved in learning.
DLTK's Alphabuddies - This site offers a large letter with fun decorations to turn the letter into an "alphabuddy." I print out all the letters for a particular word and she decorates them. Then I help her cut them out. I then mix up the letters and have her spell the sight word correctly and glue it on a piece of paper. This activity helps with both word recognition and spelling. Here's an example of when Avlyn did the word "FOR."
 Hope some of these sight word activities are useful for your preschooler or kindergartener. Happy homeschooling
We are currently working on learning our sight words. We are up to a total of 30 words that she can read fluently and without help. My goal is to have 100 words down fluently by the end of the year. I am doing things completely different than with my son. With him I focused mainly on phonics, but failed to give him a solid grasp of a large amount of sight words. This meant that in first grade he could sound out encyclopedia but struggled with generic sight words like blue and come. So with her I'm focusing largely on sight words and we do phonics 2x a week. By first grade she should be reading fluently and we can get more involved with phonics.
Here are some sight word games or activities we do to break up the monotony of sight word drills and general reading.
Spruce Up the Sight Word - I just found this site yesterday, and I love it. They provide a variety of sight words along with strips of decorative items like eyes, legs, mouths, etc... Your child can read the word and then use the provided illustrations to "spruce up" the sight word. Here's an example of Avlyn's sight word "ME."

Games to Make from Kelly's Kindergarten - This site is fabulous. I stumbled across it on my search for fun sight word activities, and I still haven't explored it thoroughly. She has a ton of games to print out and play. One example is the Krusty Krab game. It's meant to be used to teach money, but what we do is put our sight word flash cards word side down. One of us draws a card and reads the word. If we read it correctly, we move a quarter to the next space and the next person reads a word. Play continues that way. If someone misses a word, they have to move back one space. The person who gets the quarter to the other side first, wins a skittle or M&M or whatever little candy happens to be waiting on the other side.

Note: If using this sight, you will need a lot of paper and printer ink, but I think it's well worth it. We use a lot of these games on family game night, which gets the whole family involved in learning.
DLTK's Alphabuddies - This site offers a large letter with fun decorations to turn the letter into an "alphabuddy." I print out all the letters for a particular word and she decorates them. Then I help her cut them out. I then mix up the letters and have her spell the sight word correctly and glue it on a piece of paper. This activity helps with both word recognition and spelling. Here's an example of when Avlyn did the word "FOR."

Thursday, December 2, 2010
Field Trip - Hemingway-Pfeiffer Museum in Piggott, Arkansas

The tour guide at the museum was able to bring the tour down to a young child's level. While we didn't learn much about Hemingway, she did show and teach them about all of the antique things in the home and how they were used. Anything behind black ropes was original furniture used by the family in the early 1900's. I know Avlyn enjoyed seeing an old bed warmer and learning about how they used to fill it with hot bricks or tinder to keep the beds warm. I think they all thought the chamber pots and lack of indoor plumbing was a little gross, too.
There is also a studio barn on the property that was designed for Hemingway to write. History says that he wrote a great deal of his book, "A Farewell to Arms," in the barn studio. They're currently creating an exhibit of animals that represent the types of animals Hemingway hunted on his many trips around the world. The kids loved this part.
Afterward, we headed back to the Matilda and Karl Pfeiffer Museum, which is a traditionally designed tudor home. It houses an extensive mineral collection, with minerals showcased from all over the world. The tour guides at this house absolutely LOVED having the little kids, and the children were all fascinated by the shiny, colorful minerals. They even allowed them to touch some of the minerals, which is always a hit with kids. The home itself is beautiful, and there are 11-acres that can be explored on the property. We passed because it was bitingly cold yesterday, and we didn't have any mittens or hats with us. But we plan on going back in the spring. I'll post more about that museum then - with pictures.
Overall, it was a very educational experience. I would like to go back and hear the actual real tour, but the staff at the museum was great at catering to our age group and making sure the kids were interested. If you're ever in Piggott, this is definitely an interesting place to stop. The Hemingway museum charges admission, but the mineral museum simply takes donations. Hope you enjoy the pictures.
 |
| An original desk from the Pfeiffer family. Did Hemingway sit and write here? |
 |
| The ceilings in the home are made from pressed tin and then painted. |
 |
| The top of the stairwell, with the original built in child's gate to keep kids from falling down the stairwell. |
 |
| One of the bedrooms, with the old bed warmer sitting on top. Avlyn really liked learning about that. |
 |
| Same bedroom with other original furnishings. Can you see the ghosts in the mirror? ;) |
 |
| A closeup of the pressed tiles. These actually have faces pressed into them. Can you see them? |
 |
| Another bedroom. The pots on the floor are chamber pots, used before the family was able to install plumbing. An outhouse was used during the day. |
 |
| Living area to the right of the front door. The fireplace that was used to heat the house can be seen a bit to the left. |
 |
| We couldn't use a flash in the house, so this pic came out a little dark. This was the formal dining room, with original furnishings and dishes. |
 |
| The kitchen, with original stove. Plumbing was added later, so you can see a sink to the right. |
 |
| The in-progress animal exhibit. The kids saw lion, leopard, dikdik, and water buffalo, among others. This is the only picture inside the restored barn studio where Hemingway would write. Not sure why I didn't take more. Guess the excitement of the animals overtook me. |
Monday, November 22, 2010
Raised Salt Painting for Kids
 |
| Shaking off the salt |
 |
| Adding more colors |
Supplies:
Construction paper or card stock
White glue
Salt
Dropper (we used a straw, but a dropper would definitely be better)
Cookie sheet to hold salt pieces
Water
Food coloring
Small bowls
We began by placing the construction paper onto a rimmed cookie sheet. We then mixed our food colors with a small amount of water. I only had yellow and blue, so we'll try this next time with much brighter colors.
Next, have your child create a crazy design with the white glue. Help them pour salt all over the picture and shake it off. Using the dropper, suck up a small amount of colored water. Slowly drop out 1-3 drops onto the glue and watch as it travels along the salt. Keep adding color until your pictures is complete. Let dry overnight and you have a 3-D, textured picture. Happy homeschooling!
Tuesday, November 16, 2010
Pumpkin Seed Mosaics

I looked up a few pumpkin seed ideas as a jumping off point, and then finally decided to do it the way I did. The ideas I saw said to paint the seeds first and then create a picture. But I thought it would be a little easier, and relate more to fall, if I drew the outline of a picture. She filled it with seeds and then painted it. It still looks like a mosaic and it gave her a jumping off point. Knowing her, if I'd followed the advice from the other websites she'd have ended up with a bunch of painted pumpkin seeds saying, "I don't know what to create."
I took a piece of construction paper and drew an outline of a pumpkin for the first one and a pilgrim for the second. She covered the pics with glue, placed the seeds in different directions, dried them over night and then painted them the next day. She really enjoyed this project and we have these displayed on our kitchen cabinets. I think I will get more advanced in the spring with actual tile pieces and let her create something from her mind. Hopefully, her imagination will have grown a bit by then. She's not very imaginative under pressure, but she's great when she thinks no one is watching.
Wednesday, November 10, 2010
If You Give a Moose a Muffin Storyboard Presentation
After you've completed your storyboard for whichever book you choose, it's time to present it. In order to assess whether or not your child truly gets how to retell a story, you need them to go through the storyboard page-by-page and retell the story. They can do this just with you, or you can wait until the whole family is home and have them give a little presentation. Avlyn wanted to share it with her dad and brother. She practiced with me in the morning, and then later that night she presented it to her dad and brother. Below is a short video I took of her presentation. She's generally soft spoken, and for some reason she was nervous and kept rocking back and forth, so it's a little hard to hear her. But it gives you a general idea of what we did. If your child is less shy, I could see this being a much more elaborate presentation of the book. But I'll see if I can't get her to come out of her shell a little more on the next one. I hope that some of you have found this idea different and will take a stab at creating your own storyboards. Feel free to comment with links to your storyboards, cause I'd love to check out what you do differently.
The link to the YouTube video is: http://www.youtube.com/watch?v=kibKqUijHI4
I have the video set up as a private listing, so you will need to cut and paste the link in order to access it directly.
Tuesday, November 9, 2010
If You Give a Moose a Muffin Storyboard Activity Part II
Here's the update on the Teaching with Storyboards post from last week. Like I stated before, we chose If You Give a Moose a Muffin for our first ever storyboard. This blog post will cover the process, and I'll post tomorrow about the presentation of the storyboard.
Getting Started
To begin, we read the story for one week every day. I helped her start to memorize the story so she could retell it using her storyboards. After she had the story pretty much memorized, we began working on our storyboards.
Materials
Large index cards
crayons
glue
felt
material (we used an old shirt that no longer fit---you get lots of neat prints and fabrics this way)
printed clip art that related to story (for this I printed out moose, muffins, and a blackberry bush piece)
magazine cutouts
button, thread, and needle
Process
As you can see, there isn't a lot of writing with these storyboards. My point wasn't to have her copy the story onto the cards, but use her imagination to retell the story. We focused on 2-3 cards per day, and it took us almost 2 weeks to complete the entire thing. We would read the story as we created the boards, and she would draw the storyboards in relation to how she remembered chunks of the story. So one card may represent 3 pages in the story, while another might simply be 1 page. There are no set in stone rules. The storyboards I didn't include in this blog were simply hand-drawn. I tried to lead her to more creative ways to express the story, but she is very much into drawing her own pictures right now, so that's mostly what we went with.
Since these are time-consuming projects, I only have 1 planned a month. We are thinking of doing If You Give a Cat a Cupcake this month, but she's still deciding which book she wants. Tomorrow I will post a short blog post on how we presented this story to the rest of the family and saw the whole thing come together in a cute little presentation. Happy homeschooling!
Getting Started
To begin, we read the story for one week every day. I helped her start to memorize the story so she could retell it using her storyboards. After she had the story pretty much memorized, we began working on our storyboards.
Materials
Large index cards
crayons
glue
felt
material (we used an old shirt that no longer fit---you get lots of neat prints and fabrics this way)
printed clip art that related to story (for this I printed out moose, muffins, and a blackberry bush piece)
magazine cutouts
button, thread, and needle
Process
 |
| We started by adding the title to an index card with some clipart for illustrations |
 |
 |
| These storyboards illustrate the part in the story where you go to the fridge to get some of your mother's homemade blackberry jam and the moose asks for another and another muffin. |
 |
| So you have to go to the store to get some, but he wants to go with you. But since it's cold, he'll ask for a sweater. We used red felt to cut out the sweater. For the part where he notices a button is loose, I cut out another red sweater and loosely sewed a purple button onto the sweater before she glued it on the moose. |
 |
| This is her illustration for the part where the button reminds him of sock puppets so he gets scissors, glue, string etc... to make some. The next few storyboards skip ahead in the story, to the part after you help him make scenery for a puppet show and he needs to hide his ears under a sheet. |
 |
| This was one of her favorite boards to make. Using the clipart of the moose, which we also used on the title page, we found a picture of a ghost in a magazine and recreated the part where he puts the sheet over his head, which reminds him that he wants to be a ghost for Halloween. Using little magazine letters, we spelled out the word Boo!...the colors everywhere illustrate the fact that he scared himself and spilled the paint everywhere. |
 |
| This illustrates the part where you get a sheet from your bed for the moose. We cut up an old, patterned t-shirt that didn't fit her anymore to act as the sheet on the bed. |
 |
| This is one of the last scenes in the storyboard. She drew the moose going to hang up the sheet after he used it to clean up the paints. The clipart is supposed to be the mother's blackberry bushes in the yard. The last page simply had a drawing of the moose with a clipart of the muffin with the words, "And chances are...." |
Since these are time-consuming projects, I only have 1 planned a month. We are thinking of doing If You Give a Cat a Cupcake this month, but she's still deciding which book she wants. Tomorrow I will post a short blog post on how we presented this story to the rest of the family and saw the whole thing come together in a cute little presentation. Happy homeschooling!
Thursday, November 4, 2010
Teaching with Storyboards
The next few posts are going to be about something I like to call storyboards. If you've ever heard of a storyboard, it was probably in the context of a movie or television show. Creators of media use storyboards to organize their thoughts and plan out scenes. It's basically an organizational tool. In our homeschool, a storyboard is a fun, creative way to retell a story.
Since kindergarten focuses mostly on reading and writing skills, storyboards are a great way to teach a child how to retell a story. Older kids normally get stuck with this task in the form of a regurgitated book report. I know many kindergarten classrooms have the students orally retell the story or draw a picture of their favorite scene. With our storyboards, we retell the entire story with drawings, cut-outs, pictures and more. All of these items are put onto the larger-sized index cards. We recently just finished our first storyboard. Since this is a brand new experiment for us, and I couldn't find too much online about creating storyboards like this, our stories will probably improve over time.
I will be posting about the storyboard process over the next few days. I'd love to hear feedback and any suggestions you may have about creating and implementing storyboards. We're doing our presentation tonight, so I will have step-by-step pictures posted, too. If you'd like to take part in a storyboard with your homeschoolers, pick up some large-sized index cards, crayons, glue, felt, and anything else you think you might need. We chose " If You Give a Moose a Muffin" for our first storyboard, so I also printed out clipart from Word that related to the story. Look for more postings this week to follow the storyboard process.
Wednesday, November 3, 2010
How Do You Work from Home and Homeschool?
A post over on one of my favorite forums WAHM got me thinking about this topic. A mom recently went from being a work-at-home-mom to a work at home homeschooling mom and was wondering how to do it. As a homeschooling family, we understand what it's like to want to offer the best educational choice to your child and still make financial ends meet. That's why I work from home as a freelance web writer for various websites and clients. I network with a lot of WAHM's who have kids underfoot while working. Being able to work from home is great. I can start at any time, finish at anytime, and no one knows if I'm wearing a nice outfit or my Hello Kitty robe and matching slippers with my hair in a bun. But homeschooling and working from home can get difficult.
Below are some tips I think may be helpful if you're struggling to work from home and homeschool. Or if you currently homeschool and would like to make a little extra money but have been afraid to take the plunge because you think the schooling will suffer, maybe these tips will help.
Below are some tips I think may be helpful if you're struggling to work from home and homeschool. Or if you currently homeschool and would like to make a little extra money but have been afraid to take the plunge because you think the schooling will suffer, maybe these tips will help.
- Choose a work from home job that you can do well. I write because it comes easy to me, and I have the educational background that helps me land jobs. Other work from home jobs include transcription, web design, CSR for various companies, babysitting, creating an etsy store for your crafts, proofreading, online tutoring and phone scheduler.
- Become familiar with a crockpot and start a lasting relationship. I couldn't live without mine. You can put the bulk of your dinner in at 10 a.m. and not worry about it until dinner time. All you may need to do is throw on some rice or nuke some potatoes. This can give you an hour or more of homeschooling or working time that you'd normally spend on dinner prep and cooking.
- Plan to get up earlier or go to bed later than everyone else. This is easier for people who can create their own work schedule, such as online writers.
- Schedule, schedule, schedule. It doesn't need to be an exact science or even followed to a tee, but without one you will always feel that you're behind in either homeschooling or work. Use a large desk calendar so that your schedule is always visible.
- Plan your lessons on a weekly basis. I write down the general ideas I want to cover for the week. I then find appropriate activities and lessons, print out needed materials, and write down a rough draft of what we'll do each day. It's easier to plan if you use a prepackaged curriculum, but if you plan each thing separately like me, give yourself a couple of hours to get your week planned out. It's amazing how much time gets wasted when you try to plan at the last minute, and the quality of lessons usually suffers, too.
- Relax. It can be stressful working from home and homeschooling. It can be confusing to know which one to put first. Working makes you money, but your kids need to be educated. When I'm stuck on which area to give my focus I ask myself which one could be done later that night. If the lesson we're doing is going well and she's gung-ho to keep going, I won't make her stop so I can get some work done. If I have a pressing project with a tight deadline, I plan my homeschooling stuff for after dinner.
Hopefully these ideas will help you in your quest to homeschool and work or work and homeschool, whichever way you look at it. Happy homeschooling!
Thursday, October 28, 2010
Mingo National Wildlife Refuge Field Trip

We really enjoyed getting together with other homeschoolers to explore this area. I think Avlyn's favorite thing was the colors and textures of the shelf mushrooms growing on the trees. She also enjoyed kicking up all of the leaves that had gathered on the boardwalk trail

Making new friends was also nice, as she was able to explore with kids she knew and those she'd just met. She got along particularly well with one little boy. Her dad says it's always the boys....:)


Tuesday, October 26, 2010
How to Create a Kindergarten Literacy Bag Part II
My first post, How to Create Kindergarten Literacy Bags, explained exactly what a literacy bag is and how to work with one. This post is an example of what we have in our literacy bag for this week. Homeschoolers could probably work through a literacy bag a week, but if you include enough activities you can plan a monthly bag.
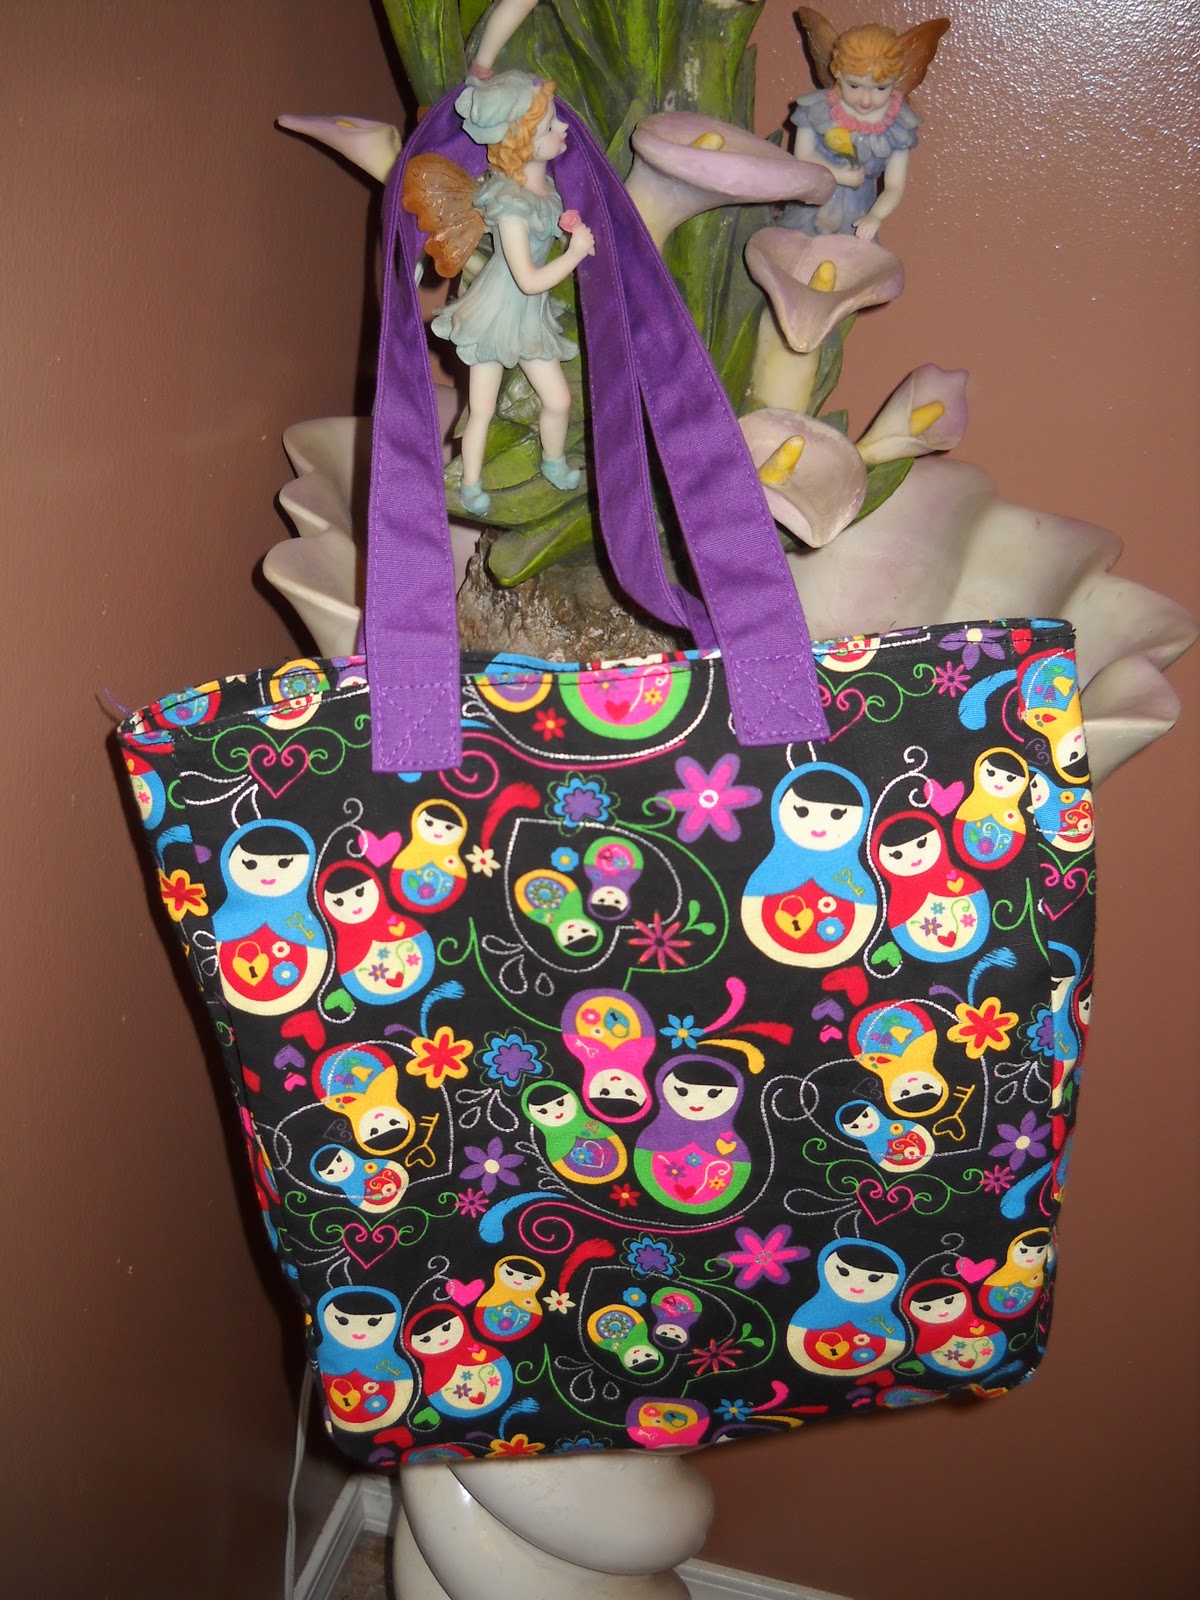 |
| The bag we've designated as our literacy bag |
We are using the book Literacy Bags as a jumping off point for theme ideas, but most of the activities are things I've researched and found on my own. The theme for our first bag is the letter A and apples.
Inside of our bag is one activity for each day. There are two math options included along with the literacy options. The math options include a photocopy of a graph from our Literacy Bags book, along with little tiny apple templates colored red, green, and yellow. The activity is to graph the apples according to color. The other math/art activity is a photocopy of three tree stumps that I found at this stamping blog. I wrote numbers on the trunks and will instruct her to draw three apple trees and then using her fingertip, she will dab on the correct number of apples with red paint.

The literacy activities include copies of our little apple templates found in our book, which I have written beginning consonants on some and word families beginning with A on others. She will match up the beginning consonant with the ending sound to create different words. Some of the ending sounds also coincide with the sight words she's learning, such as an and am. I also printed out a story from The Virtual Vine called The Little Red House with No Doors and No Windows and a Star Inside. This is a storytelling activity that involves cutting open an apple at the end to reveal the star inside the house with no doors or windows. We talked about the story and discussed vocabulary she was unfamiliar with, such as the word orchard.
 |
| math graph |
I also printed out a story from the Virtual Vine called Apples Yuck and Apples Yum! This is a sight word book of a dozen pages that uses the words I See A ------ Apple. The blanks are then filled in with color words such as blue, red, yellow etc.... followed by the word yuck or yum! She will then draw the apple according to the color mentioned and read the book. The last activity is just a brown paper lunch bag with a green pipe cleaner inside. She will paint the bag red, let it dry, stuff it with paper, and tie it with the pipe cleaner to look like an apple.
 |
| stories and craft |
The above is just one small example of how you can do a literacy bag. You can include books if you want, but we just pull them off the bookshelf. As we experiment more with these bags over the year, I will post again about our more creative and fun bags. Happy homeschooling!


Subscribe to:
Posts (Atom)