Thursday, October 21, 2010

Easy Halloween Crafts for Kids

 Here are a handful of simple things we've done for Halloween. In the first picture is the baby pumpkins and gourds we grew in our garden this summer. Avlyn simply used a permanent marker to draw faces on the pumpkins, kind of like a faux jack-o-lantern. Hanging out with our faux jacks is our 'W' witch that we made today. Avlyn is already familiar with all of her letters and letter sounds, but we are still working on writing all of the letters correctly.

This witch craft, provided by Craft of the Day, was simple and fun. I always like to show our version of crafts printed on websites or magazines, since I think it gives a more accurate description of what you're going to get at home. Craft of the Day provided the template. I printed it out on white printer paper, cut it out, traced the outline onto green construction paper, cut that out, and then she decorated it. The original instructions call for paper shreds to be used as the broom, but if you've ever tried to glue paper or yarn to a pipe cleaner, you know how frustrating it is to get things to stick. I tried yarn at first, but got aggravated and just cut  two yellow pipe cleaners in half. Then I wound them around the bottom of the red pipe cleaner to make the broom bristles. The pipe cleaner is bent in back and hooked onto the witch. After making this craft we sang Old Mrs. Witch and acted it out with the puppet.


This next picture is our take on an idea from Family Fun . Avlyn found a bunch of acorns at a neighbors house, so we came home and researched something fun and simple to do with them. We found the idea to paint them orange and draw faces on them to make mini jack-o-lanterns. While these are simple, they do take quite a few coats of paint. And the paint ends up chipping quite a bit once dry, as you can see on the unfinished ones to the right. You would need to plan to work on these throughout the day, if you wanted to have them finished by bedtime. For our next batch, we're thinking of trying spray paint instead.

Side note: If doing an acorn craft with a bunch of acorns, make sure to perform the sink or swim test first. Weevil larvae exists in acorns, and if you don't kill them before crafting they can hatch and get out in your house. The whole weevil sink or swim is a great lesson for preschoolers and kindergartners. Fill up your sink about 1/4 full. Drop in the acorns. Those that sink are free of weevil larvae and can be crafted with immediately. Those that float have weevil larvae and should be frozen or boiled to kill the larvae. We put our floaters in a plastic baggie and have had them in the freezer for about 4 days now. They should be good to go. Just to give you an idea of how prevalent weevils are, out of about 50 acorns, only 12 sunk. Happy homeschooling!

Wednesday, October 20, 2010

How to Grow Your Own Loofah (Luffa)


My mother gave me something interesting this spring - a bunch of loofah seeds. Loofah's are those little scrubby things often seen at the stores with a string tied round the top. Most people use them in the shower because they make a great exfoliator. They are as prolific as cucumbers or zucchini when growing, so they make a great homeschool project. (SINCE THIS ISN'T TECHNICALLY A LESSON, I WILL PUT THE WORD LESSON IN PARENTHESES NEXT TO ANY GOOD IDEA FOR USING A LOOFAH TO TEACH) We are still in the process of learning about them, but I thought I'd post on how to grow them so you can order seeds for the spring.

Loofah does great right in the ground, but you can also start them indoors in tiny pots. (LESSON) The one plant we have was started in a peat pot. Honestly, I kept it in the pot too long and will experiment with ground seeding this next spring. However, it has not failed to flourish. (See picture above.) In fact, it started taking over my house. Climbing up the brick wall, strangling out my smaller bushes near it, and attaching itself to my front window screens. Next year, we will make sure we have a large trellis or use our back deck to give it more room to climb. While it can climb up a brick wall, once the loofah begin to grow the weight will rip it from the wall. (LESSON)

Loofah seeds are medium-sized black seeds, and one loofah can give you up to 30 seeds or more. That's why you only need to get your hands on one to have enough seeds to last a lifetime.

It will take a few weeks before your vine grows strong and healthy. Once it does, it will start to branch out and need quite a bit of trellis support. Unfortunately, ours is only supported a few feet, so most of it is lying on the ground. We will fix that next year. Once it starts to grow, you will see little green cluster buds start to form. Those clusters will bloom into pretty yellow flowers that attract a ton of bees for pollination. (LESSON) Once the flowers dry up, a baby loofah will begin to grow. When they first start out, they resemble a certain part of the male anatomy. (POSSIBLE LESSON?) If you notice these all over your vine, you're going to have a great harvest. Here's a pic that shows cluster buds, a flower, and the baby loofah:


Our plant has been in the ground since mid-August, and we noticed our first flowers and baby loofahs about 3 weeks after transplanting it. The loofahs we currently have on the vine look like this:


As you can see, they look very much like a cucumber. I have read a variety of advice about harvesting these vegetables. Most say to wait until the loofah is brown or yellow and dried out. This means the fibers inside have dried out and you can peel it, lay it in the sun for a day, and use it. There are people who say you can pick them green, especially if you notice that they're beginning to get ground rot or mildew, and let them dry out on your porch. Others say you can pick and peel them green, but you will need to milk the loofah before it will begin to dry out. (INTERESTING LESSON) The only method we've done is to peel a dried loofah. The skin is crusty and peels away in chunks and flakes. We shook out the seeds and this is what we had left:


I personally don't care for the earthy smell of it, but I do like to cut it into chunks and use it as a dish scrubber. We are going to keep our loofah vine until the first frost kills it. I'll post an update about our harvesting/milking/peeling/drying methods then. I hope you've enjoyed this interesting vegetable and will consider planting one just for the fun learning experience. Happy Homeschooling!

Monday, October 11, 2010

Have You Been Boo'd? Teaching with Halloween Boo Grams


Halloween is approaching. It's one of our favorite holidays because my husband loves anything scary. My kids are also little zombie-freaks who like a good scare. I'm more of a mediocre scare girl myself, but I still like to decorate for Halloween. This year I learned about Boo Grams. I love fun stuff like this, and I think you can use it to teach your kids about giving and sharing at a time other than Christmas.

Basically you create a boo bag or basket and secretly leave it at a neighbor's house. You can fill your boo gram bag with all sorts of goodies. We haven't begun working on ours, but I'm thinking of putting stickers and other Halloween goodies in for the kids, along with some Halloween sprinkles and a cookie cutter for making some homemade goodies.

Inside your boo gram you put this note:

You've just been boo'd, but you don't know by who. Keep the scaring and sharing going by making up your own boo gram for another friend or neighbor. Drop it on their door and RUN! Happy Halloween.

There are variations to the different notes available for boo grams, and the one above is our own custom gram that we made up ourselves. If your neighborhood has never done this, get started and create a new tradition. Once you do a little scaring and sharing of your own, others will probably join in the fun. I'll post pics of our boo gram process next week. Happy Halloween and Homeschooling!

Thursday, August 26, 2010

Blog Overhaul

Now that regular school is back in session, it's time for me to overhaul this blog. I don't want to abandon it; I've neglected it enough as it is. But being that I now have a kindergartener and a fourth grader, I'm going to tweak it a bit. With our summer being so busy and family visiting in May and June, I just haven't had a chance to keep up with the blog. But with both of my children off to school and me home alone for six hours a day focusing on my job and what not, I'll have much more time to dedicate to the blog.

I will still have preschool related projects because it's my favorite age. And quite frankly, any projects done with a kindergartener can also be done with the 3-4 age group, give or take some minor adjustments. But I will also be including more projects for older children. I will also be showcasing the things we do as a family that have educational value. So even though my children are older, I don't plan on abandoning the blog to cyberspace. It's just going to take a different direction. But isn't that what homeschooling is all about - growing and learning.

And even though both of my children have chosen to attend mainstream schools, I consider myself a non-traditional homeschooler. Why? Because learning doesn't stop just because the school bell rings. Everything we do has some granule of learning. And because I'm so rooted in being my child's teacher, the fact that they aren't learning reading, writing, and arithmetic at home doesn't mean I wash my hands of their education. So look for future posts to cover a wide variety of topics, with a bit more focus on the younger ones for now.

Thursday, April 29, 2010

A Great Blog to Check Out

If you're working with preschoolers or even kindergarteners, you need to bookmark the blogger blog Excellence in Early Childhood Education This blog has great ideas and she posts frequently. I love a newer post about turning jar lids into little critters. I'm always throwing away jars and lids, but Avlyn would have a great time painting them and turning them into bugs for our garden. So check out her site when you get a chance for a lot of great ideas.

Monday, April 12, 2010

Fun With Play-Doh

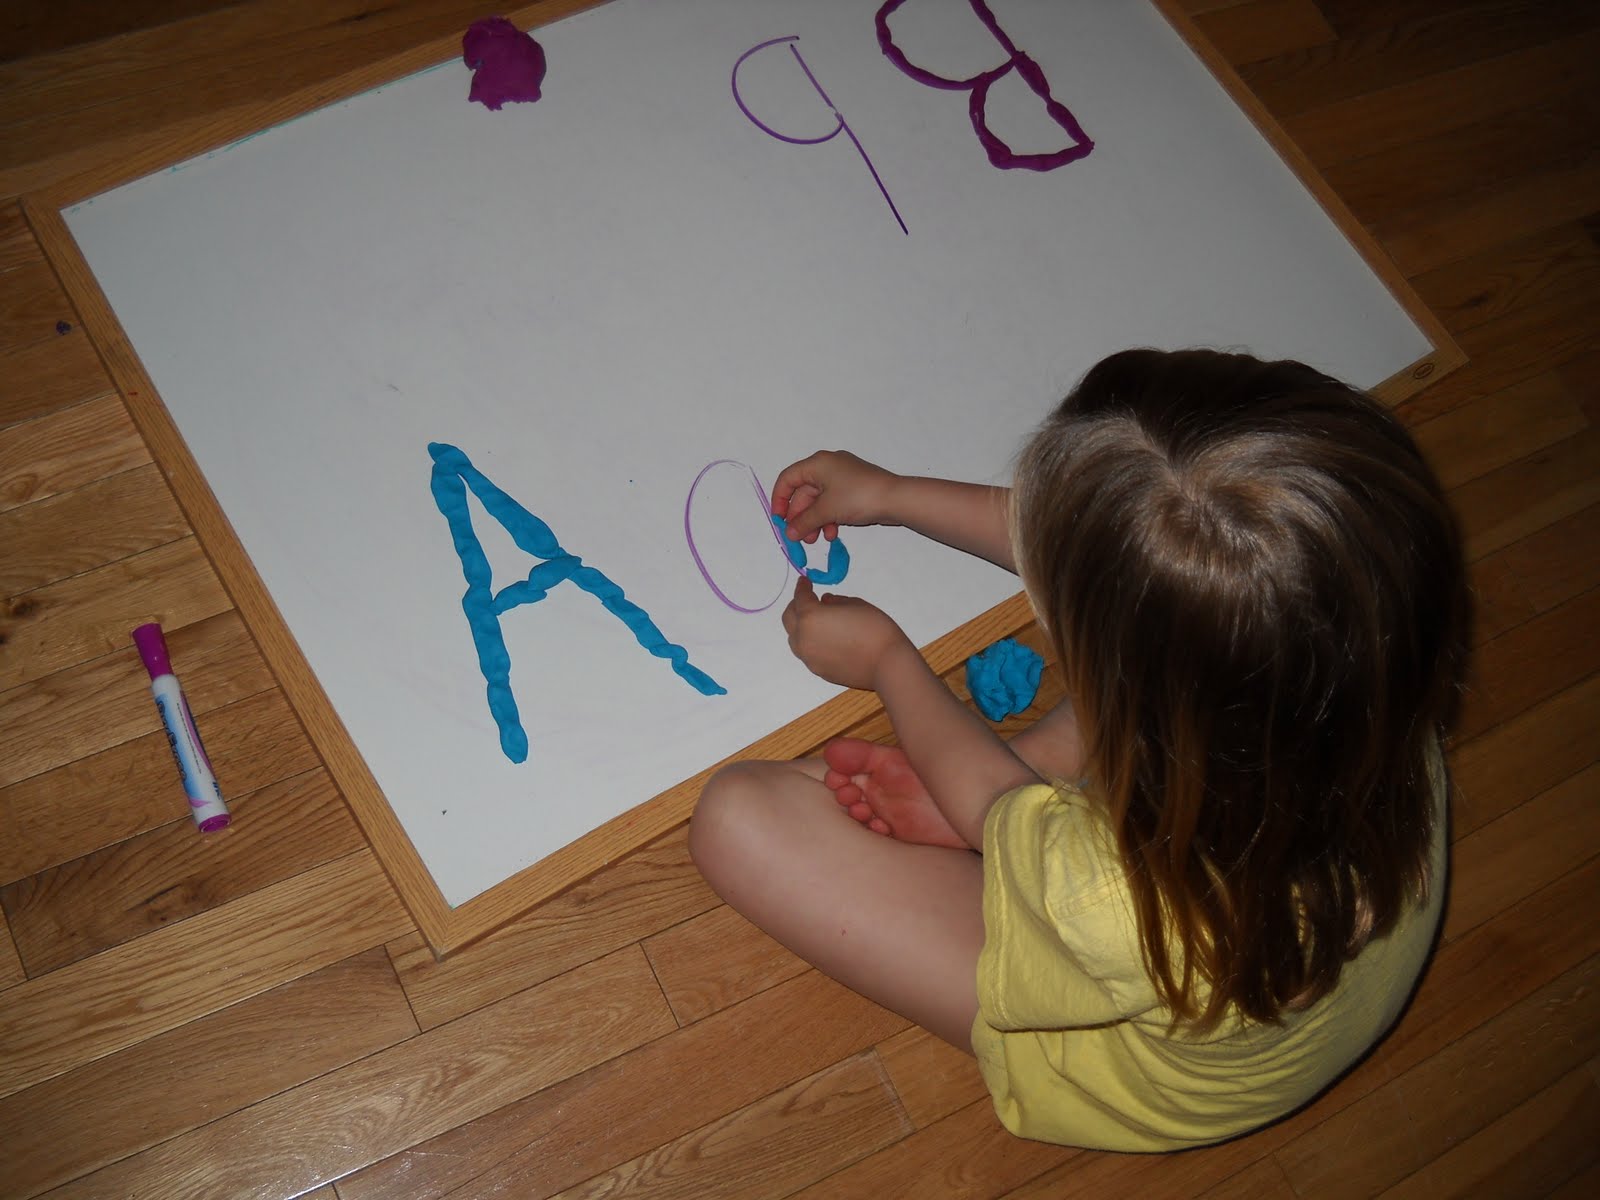
I think every house should have a few containers of Play-Doh. I know some families who have a ban on Play-Doh because it gets in the carpet. However, you can rectify that situation by purchasing a large dry erase board. This board performs double duty by acting as a writing/magnetic board and a Play-Doh board. And clean up is easy since the dry erase board material is so smooth and slick. Here are some ideas for Play-Doh lessons.

Practice letter formation: For this activity I draw both the capital and lowercase letters on the dry erase board. Then we roll Play-Doh out into long lines and trace the letter. We usually do different letters and then race to see who can finish their letter first.


Practice beginning words: For this activity I write a simple word such as bat or cat on the board. We then go over how to sound out and read the word. We also go over other words in that word family, such as sat, rat, and mat. Then we use the Play-Doh to outline the word

Practice creative arts: There is no set way to do this activity. All you need is a little imagination and lots of Play-Doh. This last time we made a person. It started out as just a face, but by the end we had added a neck, shoulders, and arms. All you have to do is draw out what you want to start with and go from there. Let the imagination run wild.


Happy Homeschooling!!

Monday, April 5, 2010

Assignment: Take Pictures of the Signs of Spring


Avlyn had a fun assignment that she really enjoyed today. Her job was to go outside with my digital camera (never running, only walking and wearing the wrist strap at all times :))and take as many pictures as she could of the signs of spring. As you can see, she photographed just about every flower in the yard. But what I was looking for, and was happily rewarded with, was her notice of the smaller signs of new life. We have the traditional daffodils and tulips popping up in our yard, and our trees our in full bloom with buds right now, but there are plenty of other signs of spring. I was hoping she'd observe them, and she did!

The signs of spring she noticed included:

Daffodils in the front yard
Tulips around our bird feeder
Little yellow dandelions popping up everywhere
Puffers (that's what we call those weeds you can blow the seeds off)
Blooms on our trees and shrubs
Little purple flowers growing alongside the shed
Wild spring onions
Our broccoli seedling coming up


Some of the more uncommon things she noticed were:

A bird with a twig in its mouth, off to build a nest
Tiny little evergreen buds that almost blend into the tree itself (I didn't even notice these)
Tiny twig buds on our oak tree
Our boat in the driveway (a sign that daddy's getting it ready for summer)
The fact that our Boston Terrier's nose and mouth were covered in mud - a sure sign spring is here and she's outside digging for moles

The number one thing I noticed as a sign of spring was that the kids have left the confines of their warm homes, taken off all the heavy jackets and mittens, and are thoroughly enjoying the type of weather that only spring can bring. Happy Homeschooling!

Tuesday, March 30, 2010

How to Make Eggshell Planters

It's that time of year again, when the weather gets better and everyone wants to head outdoors. Today we worked on making eggshell planters. I've seen this idea around on TV and such, but never tried it. The ideas I've seen usually use grass seeds to make the hair, but we used chive seeds.

This is a great hands-on lesson when learning about recycling and gardening. You can teach how eggshells decompose, so you can break up the bottom and plant it directly into the ground.

Here's how we made our decomposable eggshell planters:

First crack the top of the egg with a sharp knife. I just quickly tapped around the top of the egg, pulled it off, and drained out the yolk. Then I rinsed out the shell and put it back into the carton to dry.


This is how much egg we have left:


Next, we drew faces on the egg shells with markers.


Then we went outside and carefully filled the eggshells with potting mix and chive seeds. Then we covered the seeds with a bit more soil.


Lastly, we watered them.


They are now sitting in our windowsill. The pack says 15 days until germination, so I'll post an update of our egg people when they start to sprout. She had a really great time making these, and the egg shells will provide calcium to our garden when we transplant. Happy Homeschooling!

Saturday, March 20, 2010

Signs of Dyslexia in Preschoolers

Preschool homeschoolers have a lot on their plate. Besides teaching, they have to look for and understand the signs of certain learning disabilities. The early years are when the symptoms come to light and you may notice some things unsettling about your child's learning behaviors. My advice is to never ignore any warning signs because you don't want to believe there is a problem. Many times what seems like a problem is a temporary setback and nothing to worry about. Other times it's a sign that your child will need a little extra help.

What got me thinking about this was the way Avlyn wrote her numbers in a game of hopscotch yesterday. She drew all the squares and wrote all of the numbers except 1, 4, and 8 backwards. Not only did she draw all of these backward, she didn't follow the typical pattern of starting with 1 and working her way up to 10. She wrote the 10first (01)and then worked her way down.

I've also noticed on occasion that when she reads she will read from right to left. She never opens the book from right to left or reads the right page first, but just starts at the end of the sentence and works her way to the beginning. Of course she isn't actually reading, but making up a story that corresponds with the picture and pretending that's what the words say. She also still struggles with some minor speech problems such as the hard /c/ sound and the /g/ sound. And it got me thinking that maybe we have a problem.

But rather than get extensive testing and start freaking out, I did a little research. I think with a little extra work and repetition we won't have a problem. She did not meet 90% of the signs, and the signs she does meet I know are also common things preschoolers do as they learn. It just seems to be a setback rather than a problem. But I found the following website useful in determining signs of dyslexia in preschoolers. If any of you are experiencing the same sort of learning issues we are, try this site if dyslexia is your main concern.

Bright Solutions for Dyslexia

Sunday, March 14, 2010

Teaching Music and Theater Appreciation Involves More Than Baby Einstein

When I was pregnant with Avlyn I had a friend give me a whole set of those Baby Einstein Dvd's. I think we opened two before I resold it on eBay. While I appreciate the effort the company made at marketing a product to parents under the guise that listening and watching these makes their baby smarter, it just wasn't for us.

But that doesn't mean I'm against teaching music from a young age. It just means I want a more hands-on approach to a subject that should be fully experienced with all the senses. That's why I'm a big believer in live theater shows for young children.

I have some friends who tell me, "Oh, well I took baby to see Sesame Street Live-Nick Jr. Live, Dora Live etc.. They loved it." That's great. It's a start in the right direction. But is it true music and theater appreciation for preschoolers? I know, I know, you may be thinking that your child is not going to sit through a 2-hour show without misbehaving unless Blue is on an adventure to find clues. But have you tried?

The same parents who thought it imperative to play a Baby Mozart CD to their stomach during pregnancy are now assuming their child is too little to sit through the Nutcracker or a high school rendition of Oklahoma. Where did we lose them on the quest for increasing their child's brain power? Hopefully not for the reason that attending a live show is just too much trouble and a CD or DVD is easier.

With our son we did the usual Sesame Street shows - and ultimately he really doesn't have an appreciation for music or the theater. With my daughter though, I decided to try something different. I decided to forgo the kiddie shows and start with a more adult show. Last year we went and saw the musical Mamma Mia! It was almost 3 hours long. She had recently turned 4, and she sat through every second of it without complaint. Later that year we saw a local production of The Wizard of Oz.

This year we saw Disney's Beauty and the Beast, which includes some of the best music in a Disney show, in my opinion. The play was not aimed at kids (the fact that I could see the broomstick Babette's butt any time she bent over was testament to that.)but was a traditional off-broadway show. Again, she sat through it all without complaint. She clapped, she cheered, she got scared when the lights dimmed and the wolves appeared, and she laughed at Lafue's antics. She truly appreciated the show and the music. And to me that is more educational than any cleverly marketed DVD program or CD.

To make it more enjoyable, I download the music from the musicals and we listen to it on our way to the theater. If the show isn't a musical, then I see if there is a movie of the play and we watch that before seeing the live show. I've yet to attempt a show that neither of us has any background information on.

Not only is she learning to appreciate theater and music, she's learning how to behave at an adult event. This is a life lesson that will prove good for her as she grows and experiences new things. She's learning what it means to get dressed up and act like a lady. Now my goal is to cast a line and reel my son back in. I'm convinced I can convince him to try a show next year. I would love to watch both of my children appreciate live theater and music together.


Posted by Picasa

Friday, March 12, 2010

The Miracle of Birth

We are done having children. At least that's what we tell each other. The Lord could always have a different plan, but in our minds we are finished. Because of this, Avlyn will never experience a baby until she has her own. Her brother loved helping feed her and learning all about how to care for a baby. She is stuck pretending with dolls and plastic bottles. Or so I thought.

One day we picked up Avlyn's guinea pig, Adelis, and discovered that her belly was rather large. At first I just thought she was eating too much because her brother had gotten a little chubby, too. But she kept growing and wanting more food and tons of water. There wasn't a moment that went by when she wouldn't hear the scruffy sound of my slippers and start squealing for food.

In January, I realized she was expecting. We were very excited and nervous, not knowing what to expect. She had gotten pregnant before we got her, so I'm not sure who the 'baby daddy' is. We were careful not to squeeze her belly and mostly just left her alone. A few days before Valentine's day I held her and could feel the babies moving in her belly. I let Avlyn feel and we talked about how babies grow in bellies.

The night before Valentine's day, we held her again and felt the babies moving around. I assumed we still had a couple weeks before D-day. So I was quite surprised to check on her on Valentine's day and see a little white head looking back at me. (Adelis is all brown and her brother is black) The babies weren't there around 11 a.m., but when I checked at 2:00, there they were. Here is a pic of the piggies just a few hours after birth:


She had an albino, a black one, and a multi-colored one. Guinea pigs can be handled immediately after birth, so the kids were excited to see brand new, hours old guinea pigs. They still had their umbilical cords attached and were adamantly nursing. This experience has been a great lesson in the miracle of birth for us, and it's helped show Avlyn exactly what a mommy does for her babies.

She now has first-hand experience with the birthing and nursing process, along with how different babies develop at different rates. She thought it was neat when the babies ate real food after only 3 days. Sadly, we cannot keep five guinea pigs and the babies are off to new homes. They grow quite rapidly, and are ready to leave their mama after only a month. Aren't we glad our little ones depend on us much longer?


Above is a pic of the piggies from just two days ago. You can see how much they've plumped up and grown in less than 4 weeks. They've all since gone on to new families, which is another lesson all in itself. Happy Homeschooling!

Thursday, March 11, 2010

Cheap Homemade Bubble Blowers


Spring is right around the corner. For those of you who have dealt with a harsh winter, there's nothing like being able to open the windows and let a bit of somewhat warm air circulate in the house.

If you're like us and are dying to get outside for some playtime, use these last few colder weeks to make some bubble blowers. Both of my kids love them and they do induce a lot of giggles.

I saw the idea in Family Fun magazine a few months ago. They are super easy to make and can be used outside or in the bathtub. I'm going to have our playgroup make them when we do an Earth Day activity at our house. That's another idea - you could file this away and bring it back out for a recycling lesson on Earth Day.

Project: Bubble blower
Time: Between 5-10 minutes
Cost: Less than $3 if using items on hand.

Items needed:

1 plastic water bottle
1 wash cloth
1 or 2 rubber bands
1 bowl of soapy bubbles

Directions:

Cut the bottom off the water bottle. Attach a wash cloth to the opening using a rubber band. We had to double up because the wash cloth got so heavy after it was wet. If you use a lighter material, you probably just need 1 rubberband. If needed, trim the edges of the cloth to make it lighter. Just make sure there is no opening between the cloth and the sides of the bottle or the bubbles won't really work.

Dip the cloth into a bowl of soapy bubble water and blow through the top. This won't blow big round bubbles, but make more of a bubble 'snake.' Increase the fun by adding colors to the water or having the kids race to see whose snake grows the fastest. Happy Homeschooling!

Tuesday, March 2, 2010

Happy Birthday Dr. Seuss - Free Dr. Seuss Preschool Activities


It's time to light some oversized candles on a wacky cake and wish happy birthday to one of the world's most innovative children's authors - Dr. Seuss. If it weren't for Dr. Seuss, The Cat in the Hat probably wouldn't even exist. And no one would have the pleasure of actually trying to make green eggs and ham. And when people unexpectedly talk in rhyme when trying to make a point we could never retort, "Who are you? Dr. Seuss?" Without Dr. Seuss's bright books and wacky stories, many beginning readers would have had to suffer through beginning reading instruction with a Dick and Jane book.

To celebrate this author, we are going to crack open a handful of his books today. My kids got two sets of Seuss books for Christmas one year, so there are very few that we're still missing. We're also gonna spend some time over at
Seussville, playing online games and printing out fun activities. I've already got my printer set to spit out Dr. Seuss's activity book.

And to quote Dr. Seuss, make sure you remind your little one that: "You have brains in your head. You have feet in your shoes. You can steer yourself, any direction you choose." Happy Homeschooling!

Friday, February 26, 2010

Teaching Preschoolers About Friendship

Preschool seems to be the time when kids start making real friends. The experts say toddlers are too little to make real friends and a part of me believes that, but another part thinks that's not entirely true. However, I've seen both of my kids make true friends between the ages of 3 and 5.

I think it's important to teach kids exactly what friendship is on a level they understand. My son had to leave his best friend Diego when we moved from Florida to Missouri. This was hard on him, but we taught him that the memories he has of Diego would last his whole life. (The incident of when they both peed on our dog is the most talked about memory.) To do this we play the Memory Friend Game. This is a simple game that can be played during dinner. You simply name a friend you've had in life, and talk about all the memories you can remember, both good and bad.

Role playing is a great way to show kids what it's like to be a good friend. Preschool is the time when kids are still learning to share and not be bossy. By playing a game where you're the bossy friend, or the friend who doesn't like to share, you and your child can talk about why it's not fun to play with someone who doesn't act nicely while playing. You can then reverse the roles for more discussion and role playing.

I also like to make a "Why I Like...." list. For this my daughter picks a friend and then I write down all the attributes she likes about that friend. Then we take two different friends and see how they're alike and different. Then we talk about how you can have all different sorts of friends because everyone brings something different to your life. Her attributes are pretty basic right now. She likes her friends because they have pretty hair or because they have a pink sparkly bracelet, but it's a start to learning how to pick out good attributes in a person.

As my kids get older, we talk about respect and peer pressure. My 9-year old is currently learning about what it means to respect your friends and expect the same respect in return. He's also learning what it means to stand up for yourself and not be intimidated by someone just because they act a fool. I'm hoping that by teaching about friendship from a young age, my children will grow up with a good group of friends. Because when it comes down to it, there will come a point where their friends' opinions are more important than mom's and dad's opinion. Hopefully they'll make friends with the types of kids we'd choose for them to be friends with.

I think the thing that defines whether a person really understands friendship is not just knowing how to make a new friend, but how to maintain that relationship. Even though my closest friends and I have moved to different states, if I saw them tomorrow it would be like I'd just seen them yesterday. I'm hoping to teach my kids how to make and maintain lifelong friendships that stand the trials and tribulations that time brings. And if you're eventually sending your kids off to school, there's no better time to start teaching them about friendship than at home.

Friday, February 12, 2010

How to Make a Valentine Heart Flower


Today we made a valentine heart flower. It's so simple, and yet such a fun project too. I used it to reinforce the writing of the letter V and its sound. We are just about finished working with our letter sounds and are going to move on from sight words to phonics reading. Our current list of sight words include: A, An, And, The, It, Is. Soon we will be working on: In, On, Up, Boy, Girl


We will also be starting our Bob Books in March. Math is moving along nicely. She's definitely on a K level with math, but still a PK level with reading. But I do believe she's advanced in her computer skills. I can set her up on a website and she can navigate it all without any help. Her favorites are Starfall, PBS Kids, and Nick Jr.


Anyway, back to the craft. This is a quick craft and would work well for a large group.

Supplies:
Pink, red, green and a favorite color of construction paper
Scissors
Glue stick
Tulle, felt, or cotton ball

Draw three hearts on both the pink and red paper. Cut out. Cut out a long rectangle from the green paper for a stem. Glue the stem onto your favorite color paper. Using the gluestick, overlap the hearts to create flower petals in a circular shape. We alternated the colors, but you could do one side red and one pink, or however you like. Glue a small piece of tulle, cotton, or felt to the center. Have your child write the letter V on the paper and review the sound it makes. Happy Homeschooling!

Wednesday, February 10, 2010

Free Magazine for Missouri Homeschoolers

If you live in the state of Missouri, there is a free magazine published by the Missouri Department of Conservation called XPLOR. This nature magazine is aimed at children, and I would say it's suitable for PK-5th or 6th grade. All you have to do is sign up at the website for your free copy.

We just received our first copy for Feb./Mar. and it's full of all kinds of neat stuff. To celebrate valentine's day, it talks about the different courting rituals of animals. It also has stories about how owls digest food, the edibility of dandelions, black bears, and a lot more little tid-bits of fun nature information. This is a great subscription to start if you're currently studying Missouri or plan on studying Missouri in the near future.

And if you're in a surrounding state that doesn't publish its own magazine, you can get a subscription to XPLOR for only $5, so that's fairly cheap. Happy Homeschooling!

Sunday, February 7, 2010

How To Make a Robot Valentines Box


Tonight we all worked on helping Gavin make his valentines box for school. He finally decided on a robot. We think it turned out really well. Here's the instructions for making your own robot valentine box.

Supplies:
1 large shoe box
1 small tissue box
Duct tape
2 mini slinkies (found at walmart in the party section)
2 soup or bean cans
4 mini kaleidoscopes (found at walmart in the party section)
heart stickers (came in the box of kids' valentines)
box cutter
black permanent marker

Start by wrapping both boxes in duct tape. Once that step is completed, start working on the head. Cut two eye holes a little smaller than the circumference of the kaleidoscopes. Push the kaleidoscopes into the holes for eyes. Gavin added heart stickers as the pupils. Then he drew on a face. Do the same thing on the sides of the tissue box for the knob ears.

Next, work on the body. First we cut a slit for the valentines in the center of the stomach and wrote INPUT HERE with a small arrow. Then we cut circles a little smaller than the circumference of the bean cans. We then stuffed the cans into the holes for legs. We then drilled a small hole into the sides of the shoe box and threaded the slinkies through the holes for arms. Gavin then decorated the body of his box with more stickers.

Finally, using more duct tape we attached the head to the body. There is one piece of duct tape on each side of the head and two pieces in the back. And that's how we made our robot valentines box. Happy homeschooling!

Saturday, February 6, 2010

Young Adults Have Disturbing Ideas About Homeschooling

I've never been one to care about whether or not someone approves of homeschooling. If they're not paying my bills or supporting my family, they can stick their opinions wherever they want. But I always find it interesting to hear different opinions and the reasoning behind them. The opinions usually come fast and hard, but the reasoning is usually like "Well, uh...."

My friend who has the blog SAHMville posted an account of what happened when her husband asked a group of college students their thoughts on homeschooling. Now keep in mind these are the opinions of very young adults, late teens and early twenties. And this is a small sample in little ole' southeast Missouri. But it's disheartening to hear so many young people feel that homeschooling should be illegal. Didn't we already determine that parents can do just as well (if not better) at teaching their kids as any school system? This is just a reminder (or a slap in the face depending on how you take it) that the fight for educational choice will never end.

Friday, February 5, 2010

Visit My New Blog

I have a new blog in the works. It's called Our Money Saving Ways and can be found HERE. It's not homeschool related, but I know that many homeschoolers are interested in saving money. This blog will follow my family as we utilize certain techniques and practices to save money on everyday things. This isn't one of those get your groceries for .50 type blogs or anything like that. I think of it more as a blog that shows how we live comfortably on one and a half incomes (I work p/t from home). I hope you'll visit and share how you save money.

Tuesday, February 2, 2010

Valentines Day Card Boxes

Today we went over to a friend's house and worked on our Valentines Day card boxes. We've recently become acquainted with a family across the street who is also homeschooling preschoolers. I thought it would be fun if the girls got together and made Valentine boxes. Avlyn likes to make one because her brother makes them for school parties each year. And his school goes all out with some of the designs. We're talking a three story castle with a working drawbridge that the valentines fall out of. None of these staple two paper plates together, draw a heart, and write your name on it like they did when I was in school. So in lieu of all the valentine box excitement at the local elementary school,the tradition of making Valentine's Day boxes was born.

She's still at that age where she doesn't have a concrete idea for her box. She just wants to attack it with glue, glitter, paint, paper, and whatever else I give her. She wants it pretty and sparkly and for it to have her name on it, but that's about it. Her brother is working on turning a shoebox and a tissue box into a robot. I'll post pics and directions for that box when he's finished.

We started by taking a smaller-sized shoebox and covering the top with red paper. She then decorated it with pipe cleaners, stickers, paint pens, confetti, and crayons. She drew her name on the top and attached a 3-D heart made out of a craft stick and pipe cleaner. Here's the end product:


Her box has a flip top lid to add cards and goodies. Last year we used a regular shoebox with a full lid and just cut a slit in the top for the Valentine cards. We use the boxes to put Valentine goodies in for Valentines day and to keep any cards from friends organized. Next week we are having a small valentines party with the girls across the street, and will be filling up the boxes with all sorts of fun stuff. Happy Homeschooling!